


Setup a dashboard to monitor your website traffic
Setting up your website takes time, however, tracking activity on your website is the easy bit. Also, as good as this sounds, it is completely free, it comes at no cost to you and you also do not need to insert any credit card information.
Why would you want to do this?
If you are wondering why you need customer analytics embedded in your website, the answer is simple, you have data you can use to monitor audience activity and also improve audience interaction with your website.
There are numerous customer analytics platforms available. The most common of them is Google analytics. I will discuss how you can setup Google Analytics for your website. The storyboard below shows how you can add this to your website in 12 steps.
-
Click Sign up for Google analytics
-
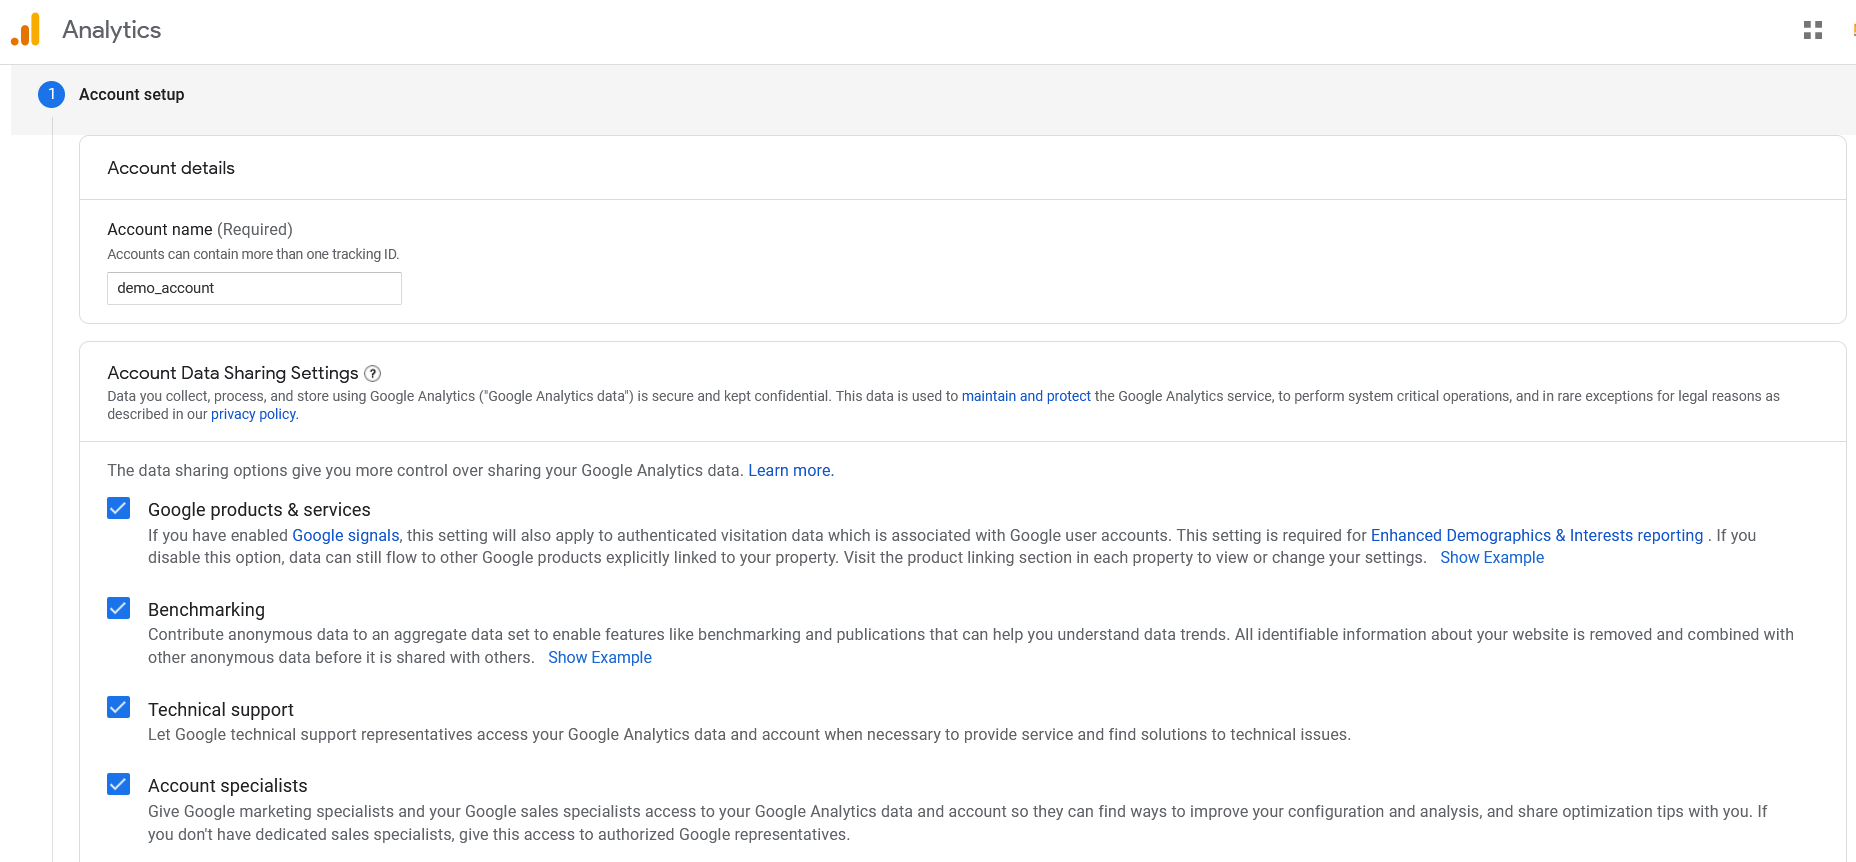
Enter a name for the Account
-
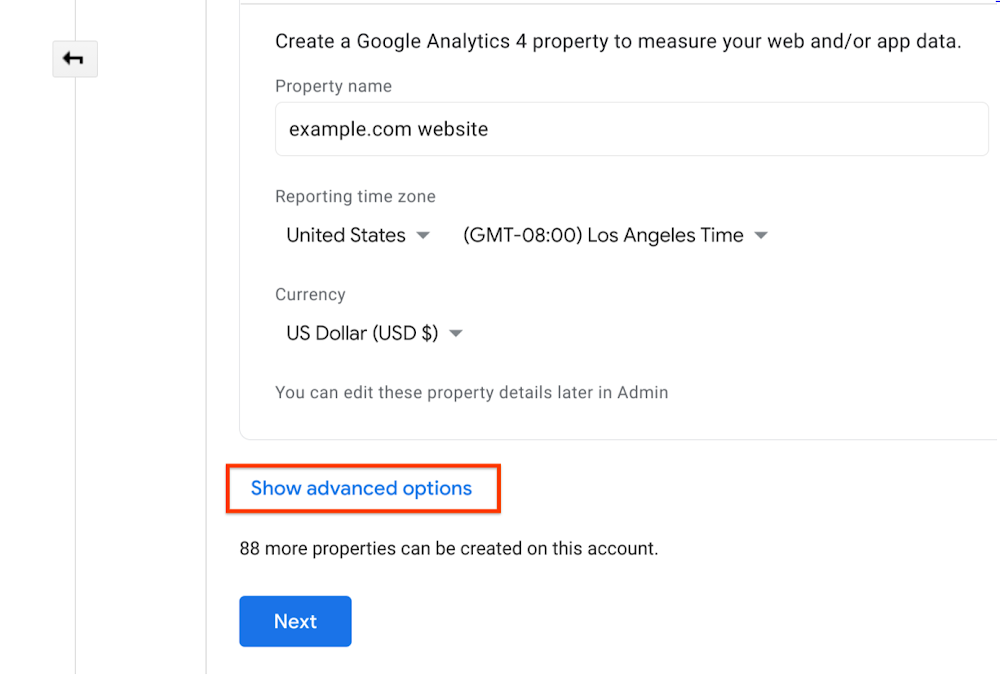
Enter a name for the property (e.g. "My Business, Inc website") and select the reporting time zone and currency. If a visitor comes to your website on a Tuesday in their time zone, but it's Monday in your time zone, the visit is recorded as having occurred on Monday. A property represents your website or app, and is the collection point in Analytics for the data from your site or app. [1]
-
Click Show advanced options (below the property-setup fields).
-
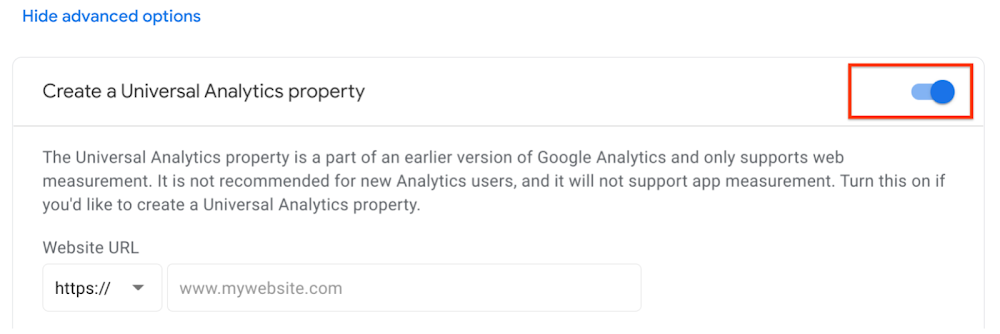
Turn on the switch for Create a Universal Analytics property.
-
Enter the website URL. Select the protocol (http or https).
-
Choose to create
- Both a Google Analytics 4 property and a Universal Analytics property
- Only a Universal Analytics property. Choose this option if you only want a Universal Analytics property.
-
Click Next and provide information about your business.
-
Click Create, accept the Analytics Terms of Service and the Data Processing Amendment if prompted, and click Finish.
-
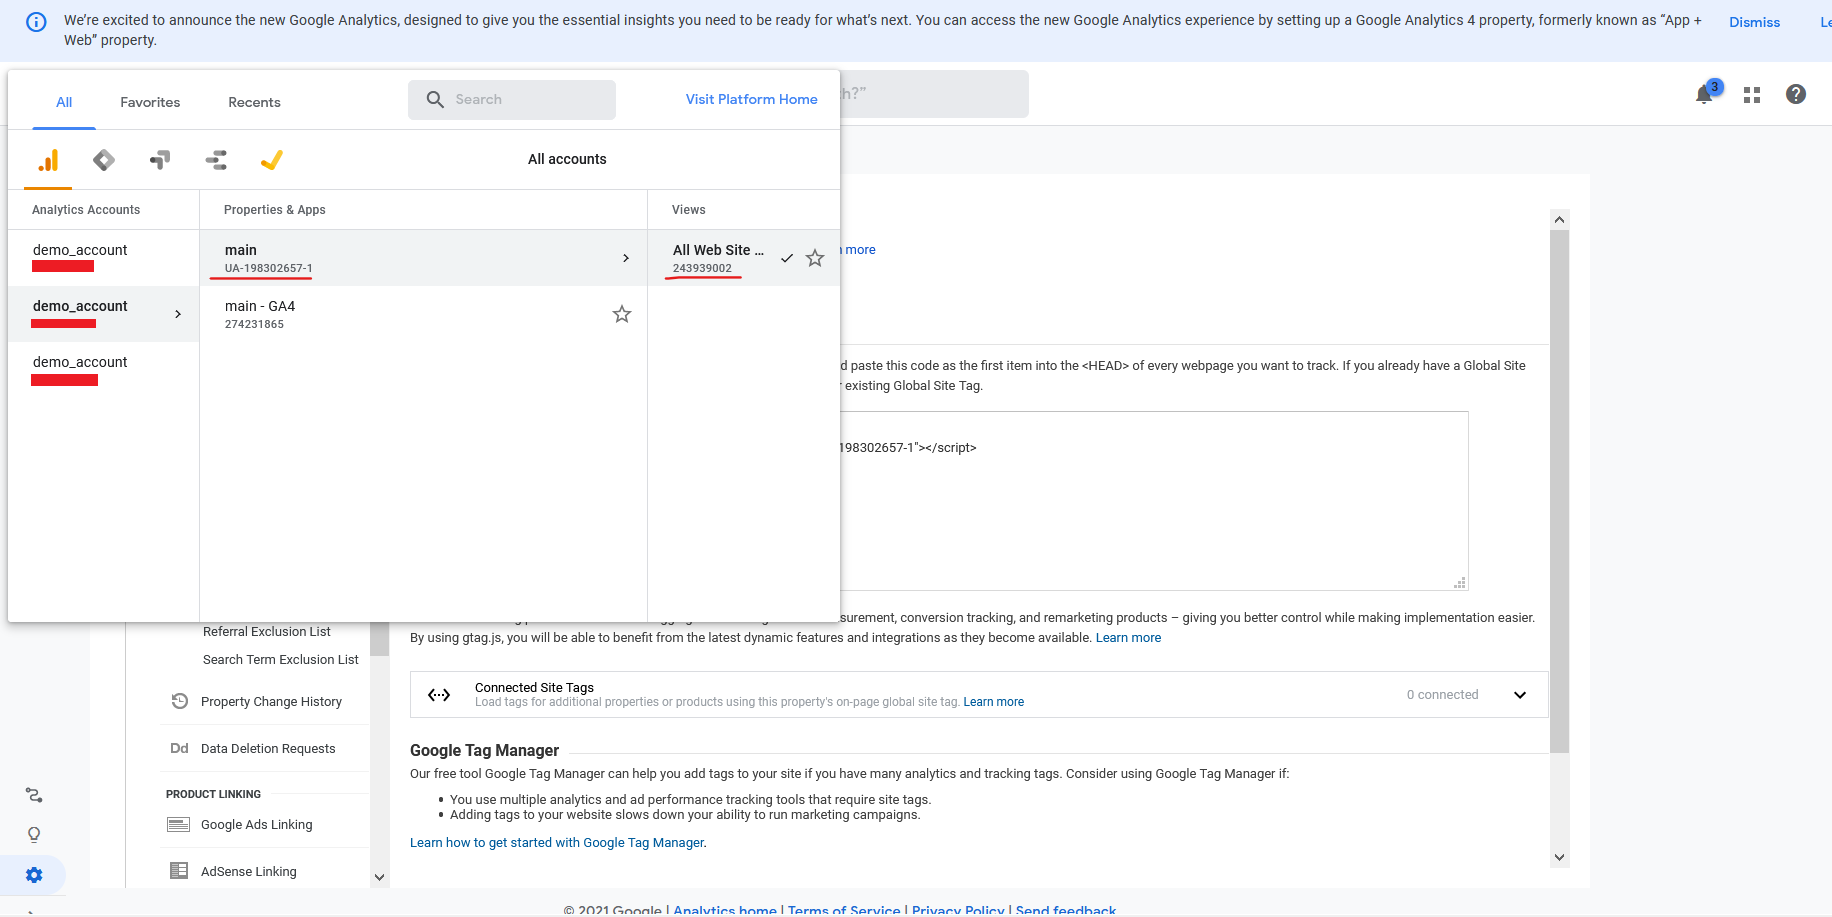
Click All account just beside the Analytics at the top left, hover over the Property with "Universal Analytics Tracking ID", and click the view on the right.
-
Click Admin on the bottom left and Navigate to Tracking Code under Tracking info.
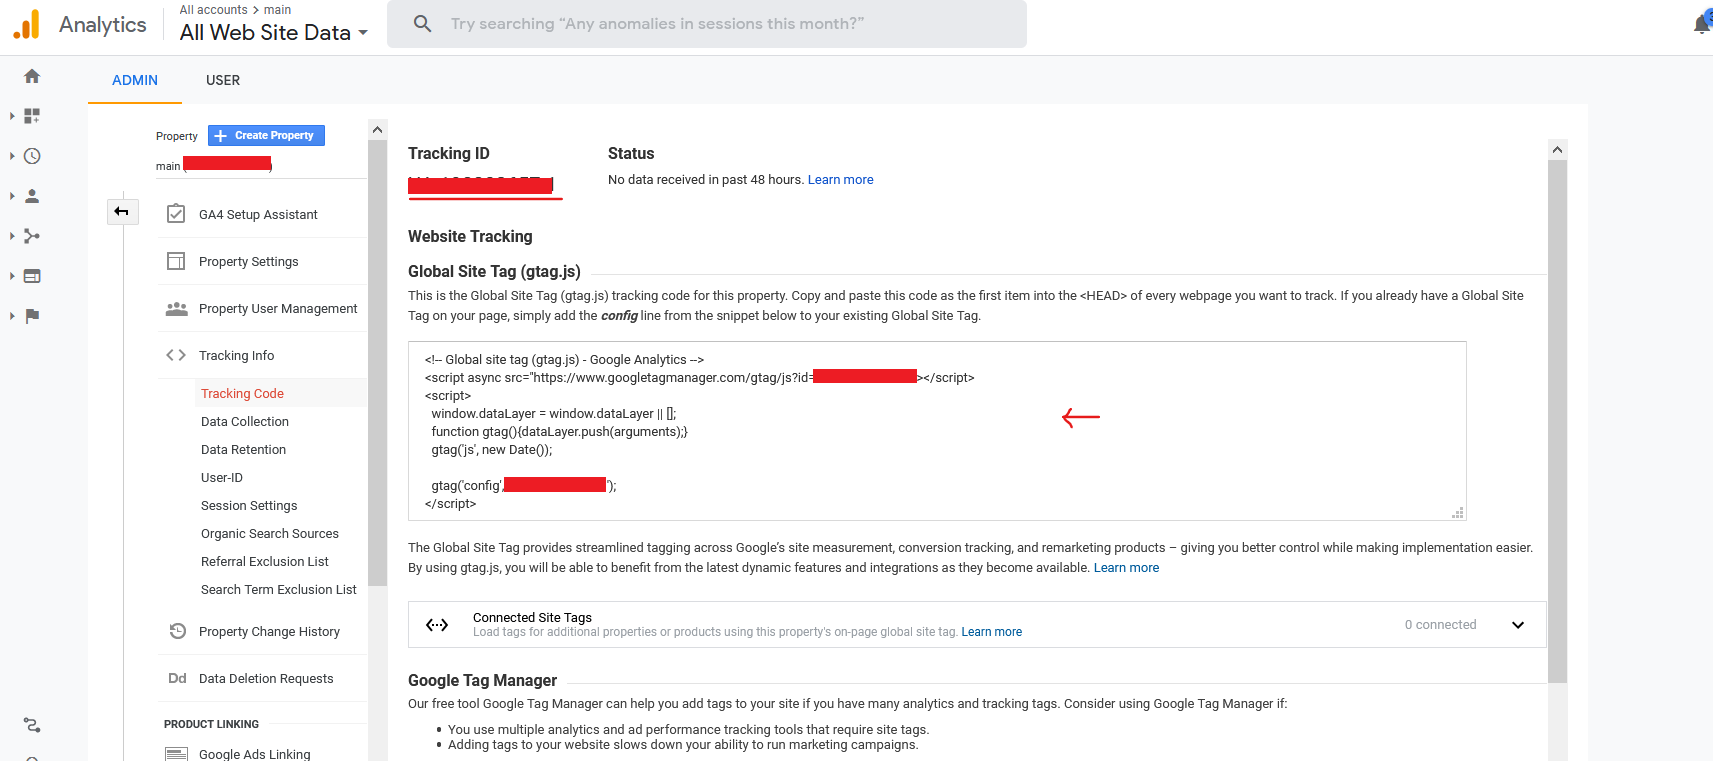
-
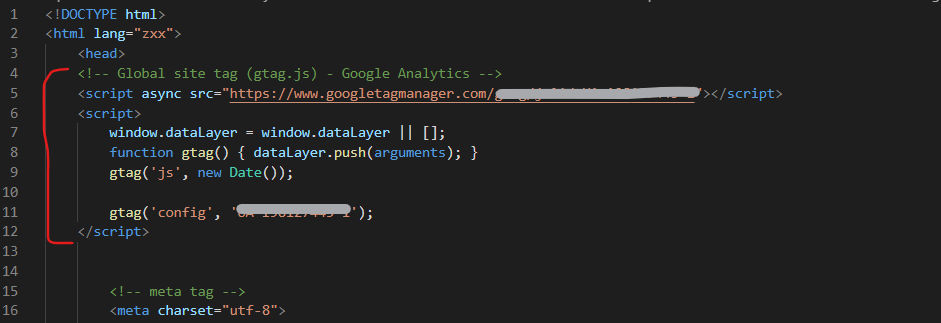
Copy the property tracking code and paste after the
section of the html page you want to track.
That's it! Thank you for reading my article.
Head over to the Google Analytics dashboard and click Real time to register your first session whilst you are on the page where you have just added the tracker.
Note: This mighty take a few minutes to register.
Sources
Leave a Reply
Your email address will not be published. Required fields are marked *