


Setup GitHub pages for web hosting
Building websites this decade is a lot easier than it was at the start of the previous decade. Back then, I would secure a domain, then I had to pay for the hosting monthly or annually, after which I had to upload my website to the server using FileZilla. The cost of hosting a website has always been a deterring factor as well especially when you are not guaranteed income from the website.
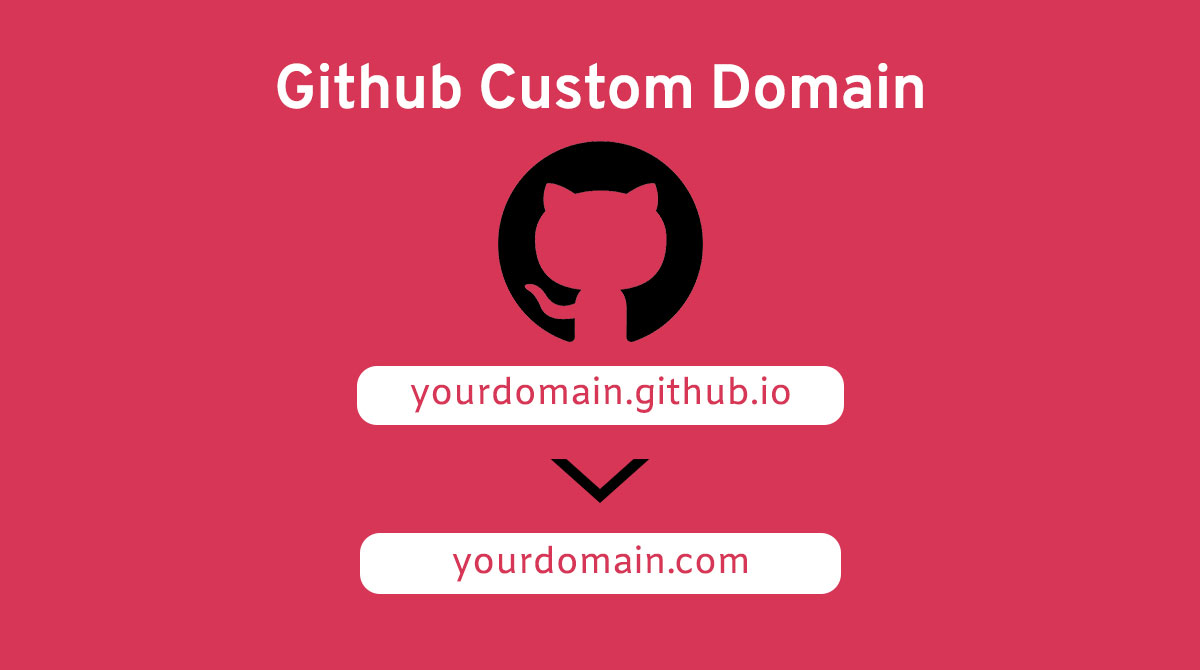
Guess what: I found GitHub pages and the scales fell off my eyes. I know I am new to the GitHub pages fan-club but I am sure many people are as well. GitHub pages provides you a free domain to use e.g. websitename.github.io. GitHub pages also offers you free hosting for your domain e.g. websitename.com. Although, you get to use GitHub Pages at least once but this will depend on the type of GitHub account you are on.
The below showcase the simple steps involved in hosting your domain name for free on GitHub.
Phase 1 - Purchase domain and setup GitHub pages
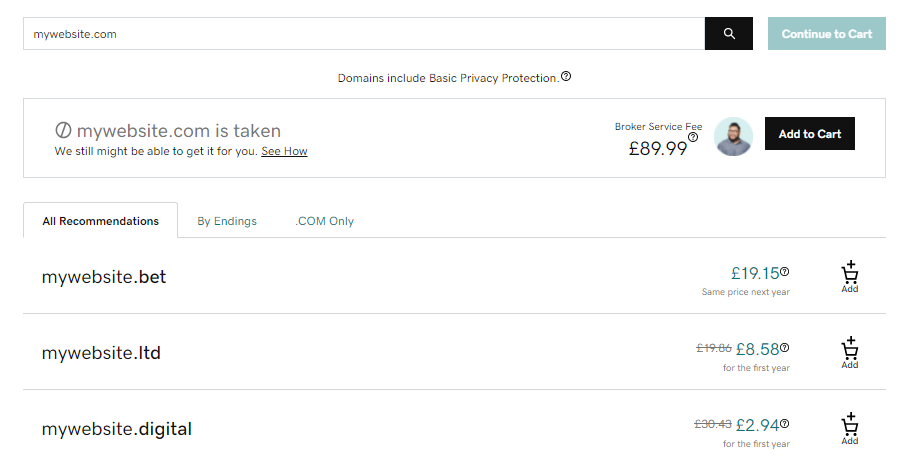
- Check availability of and purchase your preferred domain name.
- Create a GitHub repo for your website
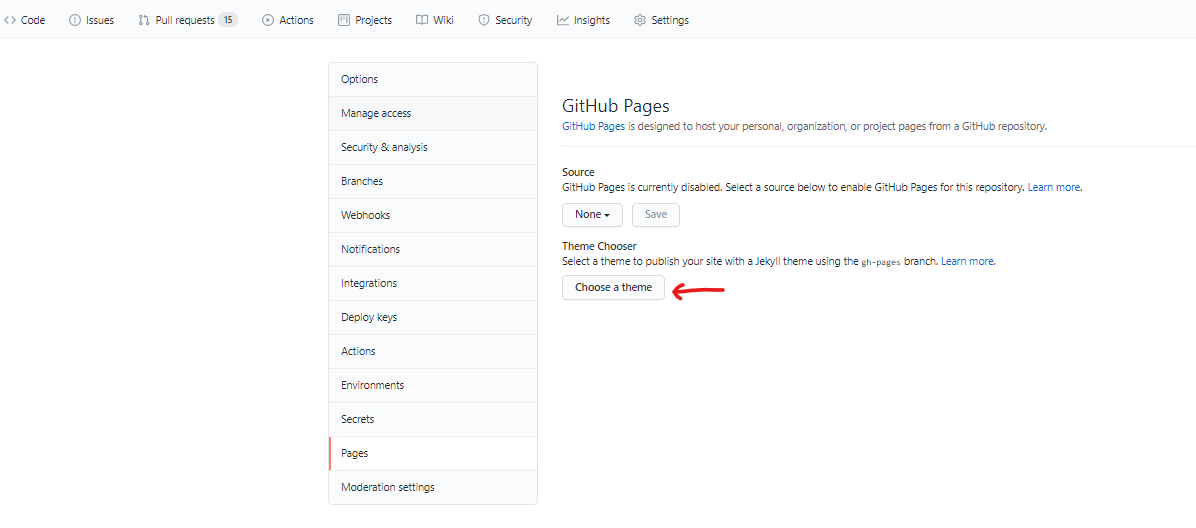
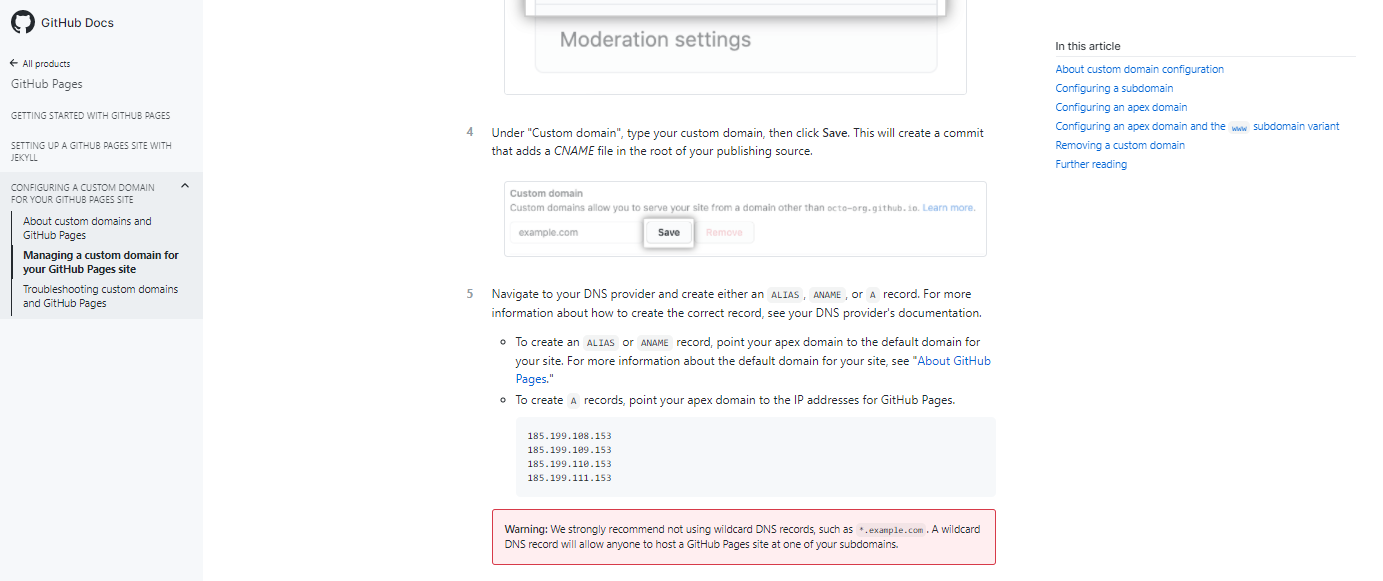
- In your git repo, navigate to settings and click pages. Use the free customisable themes on GitHub or search for a fancy customisable html web template on ThemeForest.
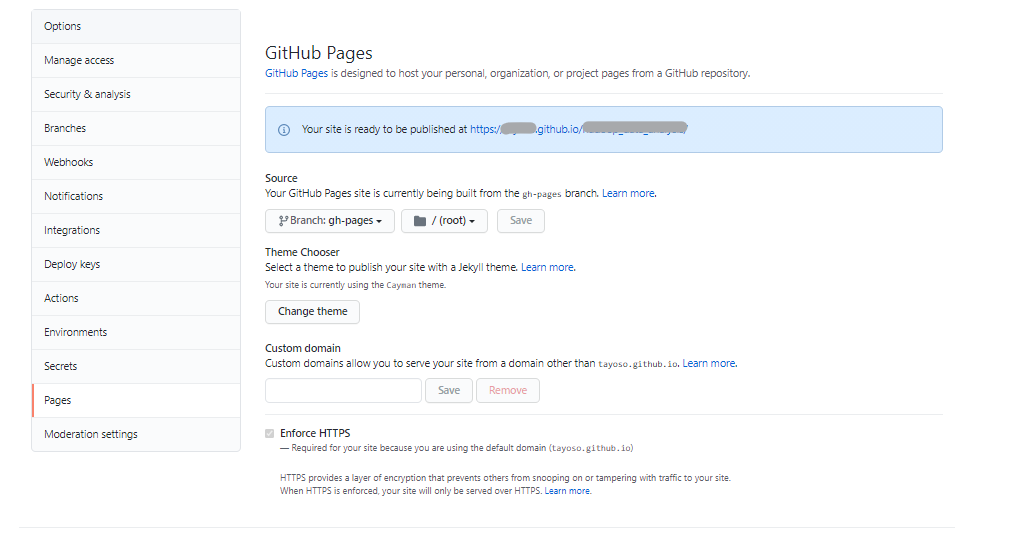
- Customise the template and add it to your git repository. Update the Source to the branch you wish to be published.
- You should see the below. Click on the new GitHub.io URL and preview your website.
Phase 2 - Configure the custom domain
- Open another tab on your browser and go to "manage DNS" or "DNS settings" from inside your domain
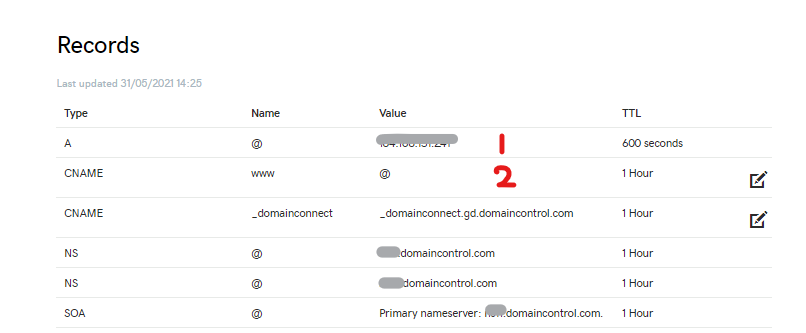
-
Add one of the port number from GitHub custom domain as seen below. Basically, in the first 2 rows, update the "Values".

-
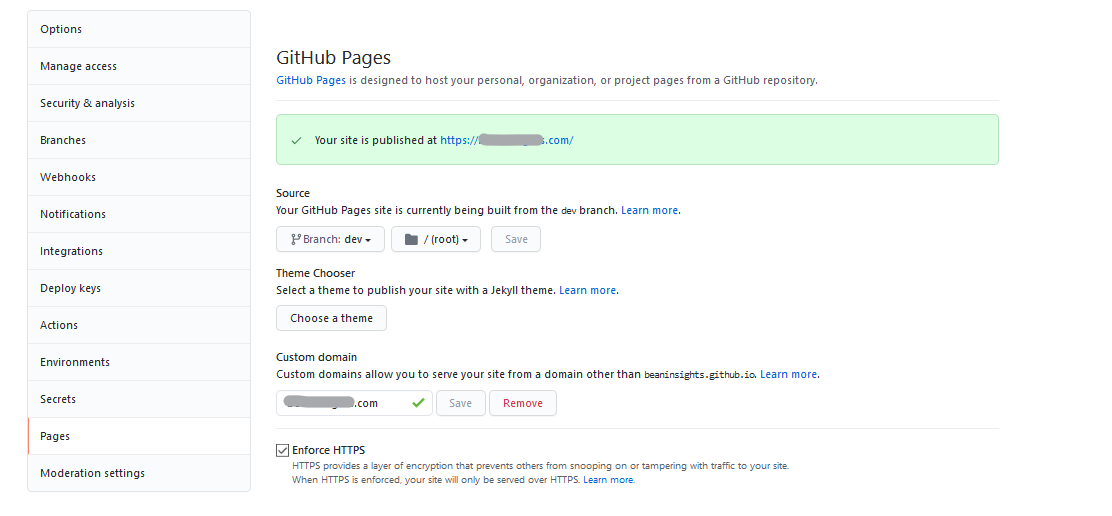
Update the custom domain URL with the preferred domain name from step 1. Wait a few minutes for the verification checks. A successful check should look like the below.
Viola! That's it. Thank you for reading my article.
If you want to set up customer analytics on the backend, I advise you read this article on setting up a dashboard to monitor your website traffic.
Leave a Reply
Your email address will not be published. Required fields are marked *